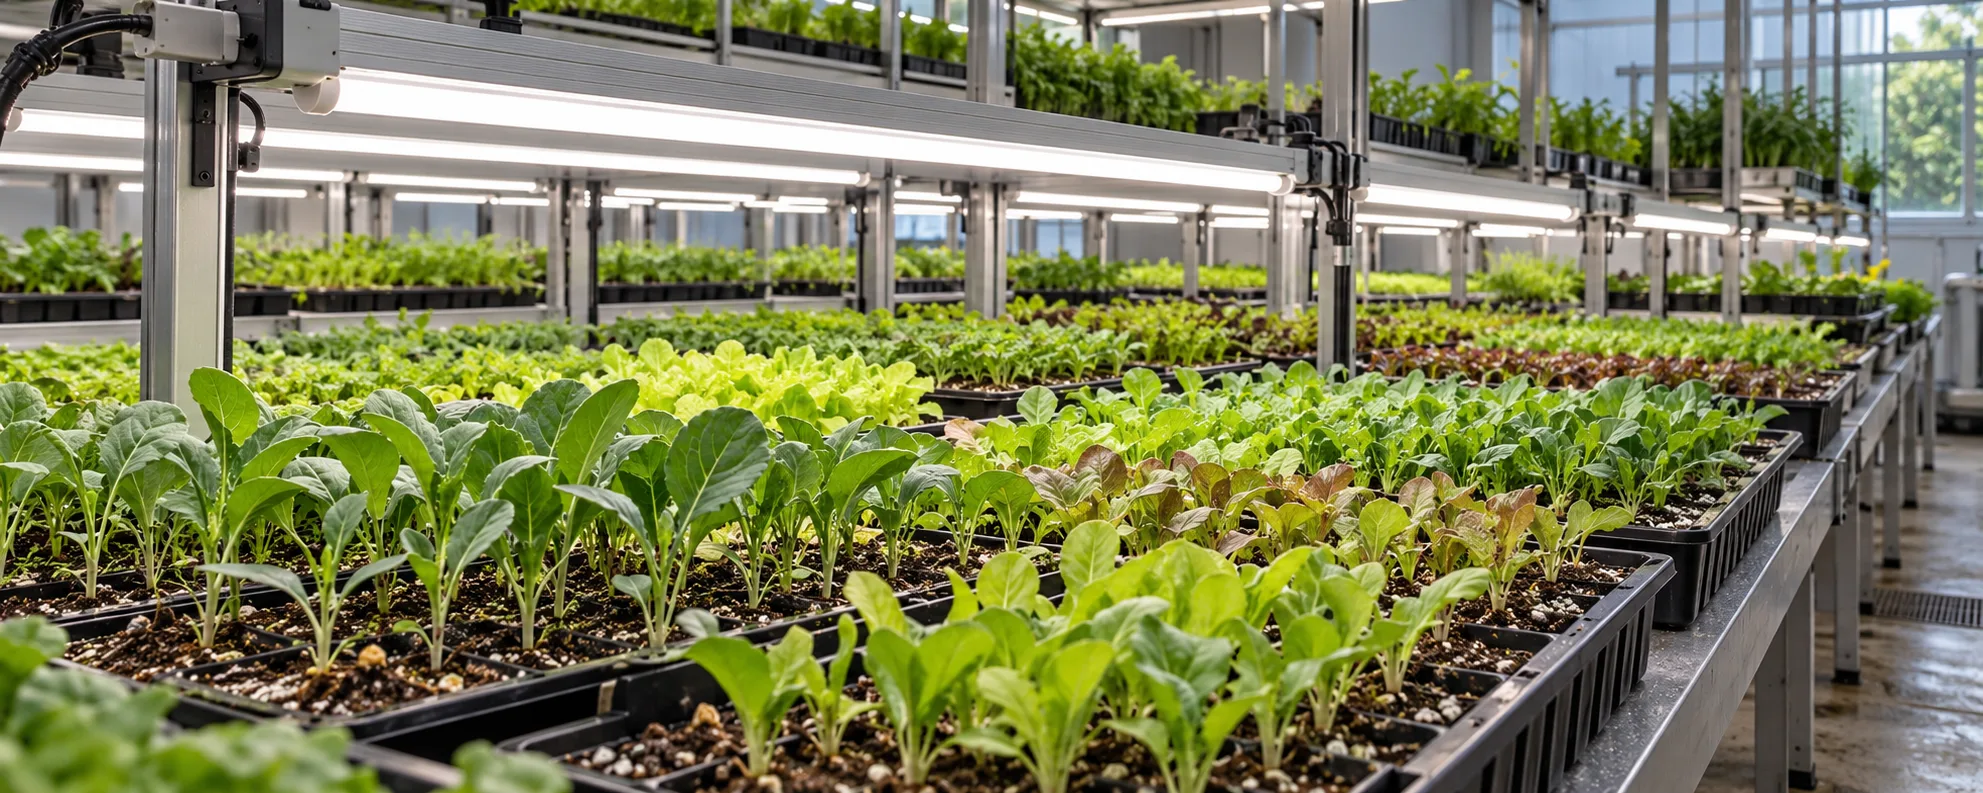
Young plants are the most light-sensitive stage in production: too little light and they stretch into weak, leggy transplants; too much and you risk bleaching or heat damage on tender tissue. Propagation lighting is therefore about a moderate, even light on dense, low shelves — not the high PPFD of a flowering room. This article covers DLI, spacing and the mistakes that cost you uniform transplants. The propagation industry page carries the full planning method.
Propagation wants moderate, even light
Seedlings and cuttings need enough DLI to build stocky structure but not so much that they stress. Because propagation shelves are dense and close, the design goal is even coverage at modest PPFD rather than intensity. The DLI conversion still applies; you just land at the lower end of the band typical for young plants.
| Target DLI | 16 h | 18 h | 20 h |
|---|---|---|---|
| 6 mol/m²/day | 104 µmol/m²/s | 93 | 83 |
| 8 mol/m²/day | 139 µmol/m²/s | 123 | 111 |
| 10 mol/m²/day | 174 µmol/m²/s | 154 | 139 |
Spacing and shelf layout
On propagation shelves, fixtures sit close to the trays, so small spacing errors cause big PPFD swings. Overlap fixtures to keep CV low across the tray, and watch the edges — trays at the shelf edge often get less light than those in the middle. A test grid across a filled shelf is the fastest way to find edge drop-off.
Stretch is a lighting symptom
Leggy seedlings are usually crying out for more light or more even light, not more fertilizer. Before changing anything else, measure PPFD across the shelf and check the edges.
Avoid bleaching tender tissue
Cuttings and seedlings have little cuticle and burn easily. Keep PPFD moderate, maintain spacing, and never let fixtures touch trays. If you must raise intensity, raise it gradually during acclimation. Our propagation rack grow lights are built for exactly this close, low-intensity shelf use.
- Aim for moderate DLI at the lower young-plant end.
- Overlap fixtures; check shelf-edge drop-off.
- Keep fixtures clear of trays and tender tissue.
- Acclimate gradually if raising intensity.
- Measure PPFD across a filled shelf, not an empty one.
References
- MSU Extension / e-GRO — propagation and transplant lighting
- University of Florida IFAS — nursery and greenhouse
- Royal Horticultural Society — sowing and cuttings
| Problem | Likely cause |
|---|---|
| Stretching seedlings | Too-low or uneven light |
| Bleaching tips | Too-high PPFD, fixture too close |
| Edge trays weak | Shelf-edge light drop-off |
| Slow rooting | Needs moderate, even light |
Worked example: lighting a propagation area end to end
This example is illustrative. Assume a propagation room with 20 m2 of tray space handling three stages: germination in covered trays at very low light, young seedlings at moderate intensity, and cuttings rooting at moderate intensity with long photoperiods. Fixtures are 300 PPF bars at 2.7 umol/J.
- Germination zone: 50-100 umol/m2/s is a common starting band while trays stay covered; at 16 hours this equals a DLI of 2.9-5.8 mol/m2/day.
- Seedling zone: 150-250 umol/m2/s after trays come off; at 16 hours, DLI = 8.6-14.4 mol/m2/day.
- Cutting rooting zone: 100-200 umol/m2/s keeps cuttings alive while roots form; unrooted cuttings cannot transpire enough to support high light.
- Fixture count for the seedling zone: 200 x 20 x 1.15 (uniformity) = 4,600 umol/s required, so 4,600 / 300 = 15.3, rounded to 16 bars.
- Dimming covers the other zones: the same 16 bars dimmed to roughly 25-50 percent serve germination and cutting stages, which is why deep dimming matters more than extra fixtures in propagation.
- Mounting: bars at 0.30-0.50 m above the tray with adjustable height, because tray height changes by stage and crop.
The pattern worth noticing: propagation does not need the highest intensity in the facility, it needs the widest control range. One well-dimmed fixture platform serving three stages beats three fixed-output systems, provided the dimming holds its spectrum and efficiency at low output.
Stage transitions: the moments propagation fails
Cover removal and the first light step
The riskiest moment in seedling production is the transition from covered germination to open tray light. Plants raised at 80 umol/m2/s under a humidity dome cannot step to 300 without wilting, yet many operations change light and humidity in the same hour. Stage the transition: first remove the dome and hold light low, then raise intensity over two to four days while watching for wilt, and record what worked for each crop. The same logic applies to cuttings as roots form and transpiration capacity returns.
Hardening off before the next environment
Young plants moving from propagation into a greenhouse or high-light finish room face a step change in light, wind and humidity. A hardening phase at the higher end of propagation light, with increasing air movement, prepares plants for that jump. Lighting that dims upward smoothly (and fixtures mounted high enough to serve taller hardened plants) turns hardening from a bottleneck into a scheduled stage.
Questions to ask before you buy
- Does the fixture dim smoothly from under 10 percent up to full output without flicker or spectrum shift?
- Is the spectrum suitable for young plants, or is it a flowering-optimised spectrum repurposed for propagation?
- What mounting systems allow height adjustment as trays and plants change through stages?
- What are the IP and corrosion ratings for a room run at propagation humidity?
- Can the supplier quote one platform for propagation and finish rooms so spares and controls stay uniform?
Common mistakes in propagation lighting
Propagation punishes lighting mistakes fast, because young plants have no reserves to buffer them. The recurring errors:
- Running one intensity for all stages; germinating trays and rooting cuttings have opposite needs from hardened young plants.
- Lighting to the schedule instead of the stage: calendar-driven step-ups that ignore what the seedlings actually show.
- Under-dimming capability, so the low outputs young plants need come from fixtures that flicker or shift spectrum at the bottom of the range.
- Fixtures fixed at one height with no adjustment as trays stack, plants grow and stages change.
- Ignoring humidity interaction: bright light over a saturated dome drives condensation and disease pressure rather than growth.
- Skipping the transition discipline, moving trays from dome to full output in one step and blaming the media when they stall.
Scheduling propagation light around the finishing plan
Work backwards from the finish date
Propagation is a service to the finishing rooms, and its light schedule should be derived from the transplant date, not from its own convenience. Working backwards: transplant date sets the hardening window, the hardening window sets the rooting duration and its light steps, and the rooting duration sets sowing or sticking dates. A propagation room that follows this chain delivers uniform trays on the day the finishing space is ready; one that runs on its own rhythm creates both bottlenecks and stretched, over-kept young plants.
Batch records as lighting records
Each propagation batch should carry its lighting history: intensity steps by date, photoperiod, any deviations and the reason. The record costs two minutes per batch and answers the questions that recur every season: why did this batch root unevenly, why did that one stretch, what was different. Over a year the records become the calibration dataset for the whole young-plant program.
| Batch | Stage | PPFD (umol/m2/s) | Photoperiod (h) | Date range | Note |
|---|---|---|---|---|---|
| B-041 | Germination | 80 | 16 | Day 1-5 | Dome on |
| B-041 | Seedling | 180 | 16 | Day 6-14 | Dome off, staged step |
| B-041 | Hardening | 250 | 16 | Day 15-18 | Fan exposure added |
| B-042 | Cutting rooting | 140 | 18 | Stick day 1-12 | Mist interval 10 min |
Frequently asked questions
Why are my seedlings stretching?+
Usually low or uneven light. Measure PPFD across the shelf (including edges); increase moderate light or fix overlap before changing feed.
How much DLI do seedlings need?+
Often toward the lower young-plant end (roughly 6-10 mol/m²/day as a starting point). Confirm for your species and stage with a trial.
Can I use flowering-room lights for propagation?+
Too intense and too far. Propagation wants lower PPFD close to the tray; use low-watt rack bars built for shelves.
How close can fixtures be to trays?+
Close, but never touching, and watch leaf temperature. Tender tissue bleaches easily — keep clearance per the fixture guidance.
Do clones need different light than seeds?+
Both want moderate even light; cuttings are especially heat- and light-sensitive. Keep intensity modest and acclimated.
How do I check uniformity on a shelf?+
Map PPFD on a grid across a fully loaded shelf and compute average and CV; fix edge and centre gaps with overlap.
Lighting a propagation room?
Share shelf size, tray layout and crop. We help set propagation DLI and spacing.
Get a Grow Light Solution